An organizational map (org map) defines the structure of an organization, relationships, and relative levels of the locations, departments, and positions/jobs. Characteristically, the org map should represent the relationships of jobs to a department, departments to a location, and locations to the organization. This allows you to visualize the complete structure of your organization in a single image. Creating an org map in Kronos Workforce Central also offers several other benefits, most notably when it comes to scheduling.
The org map is built to look similar to a tree. It has branches extending from a trunk, twigs that extend from the branches, and leaves that extend from the twigs. In this case, the “trunk” will be your organization, the branches will be various locations, the twigs represent cost centers/departments, and the leaves are individual jobs or positions.
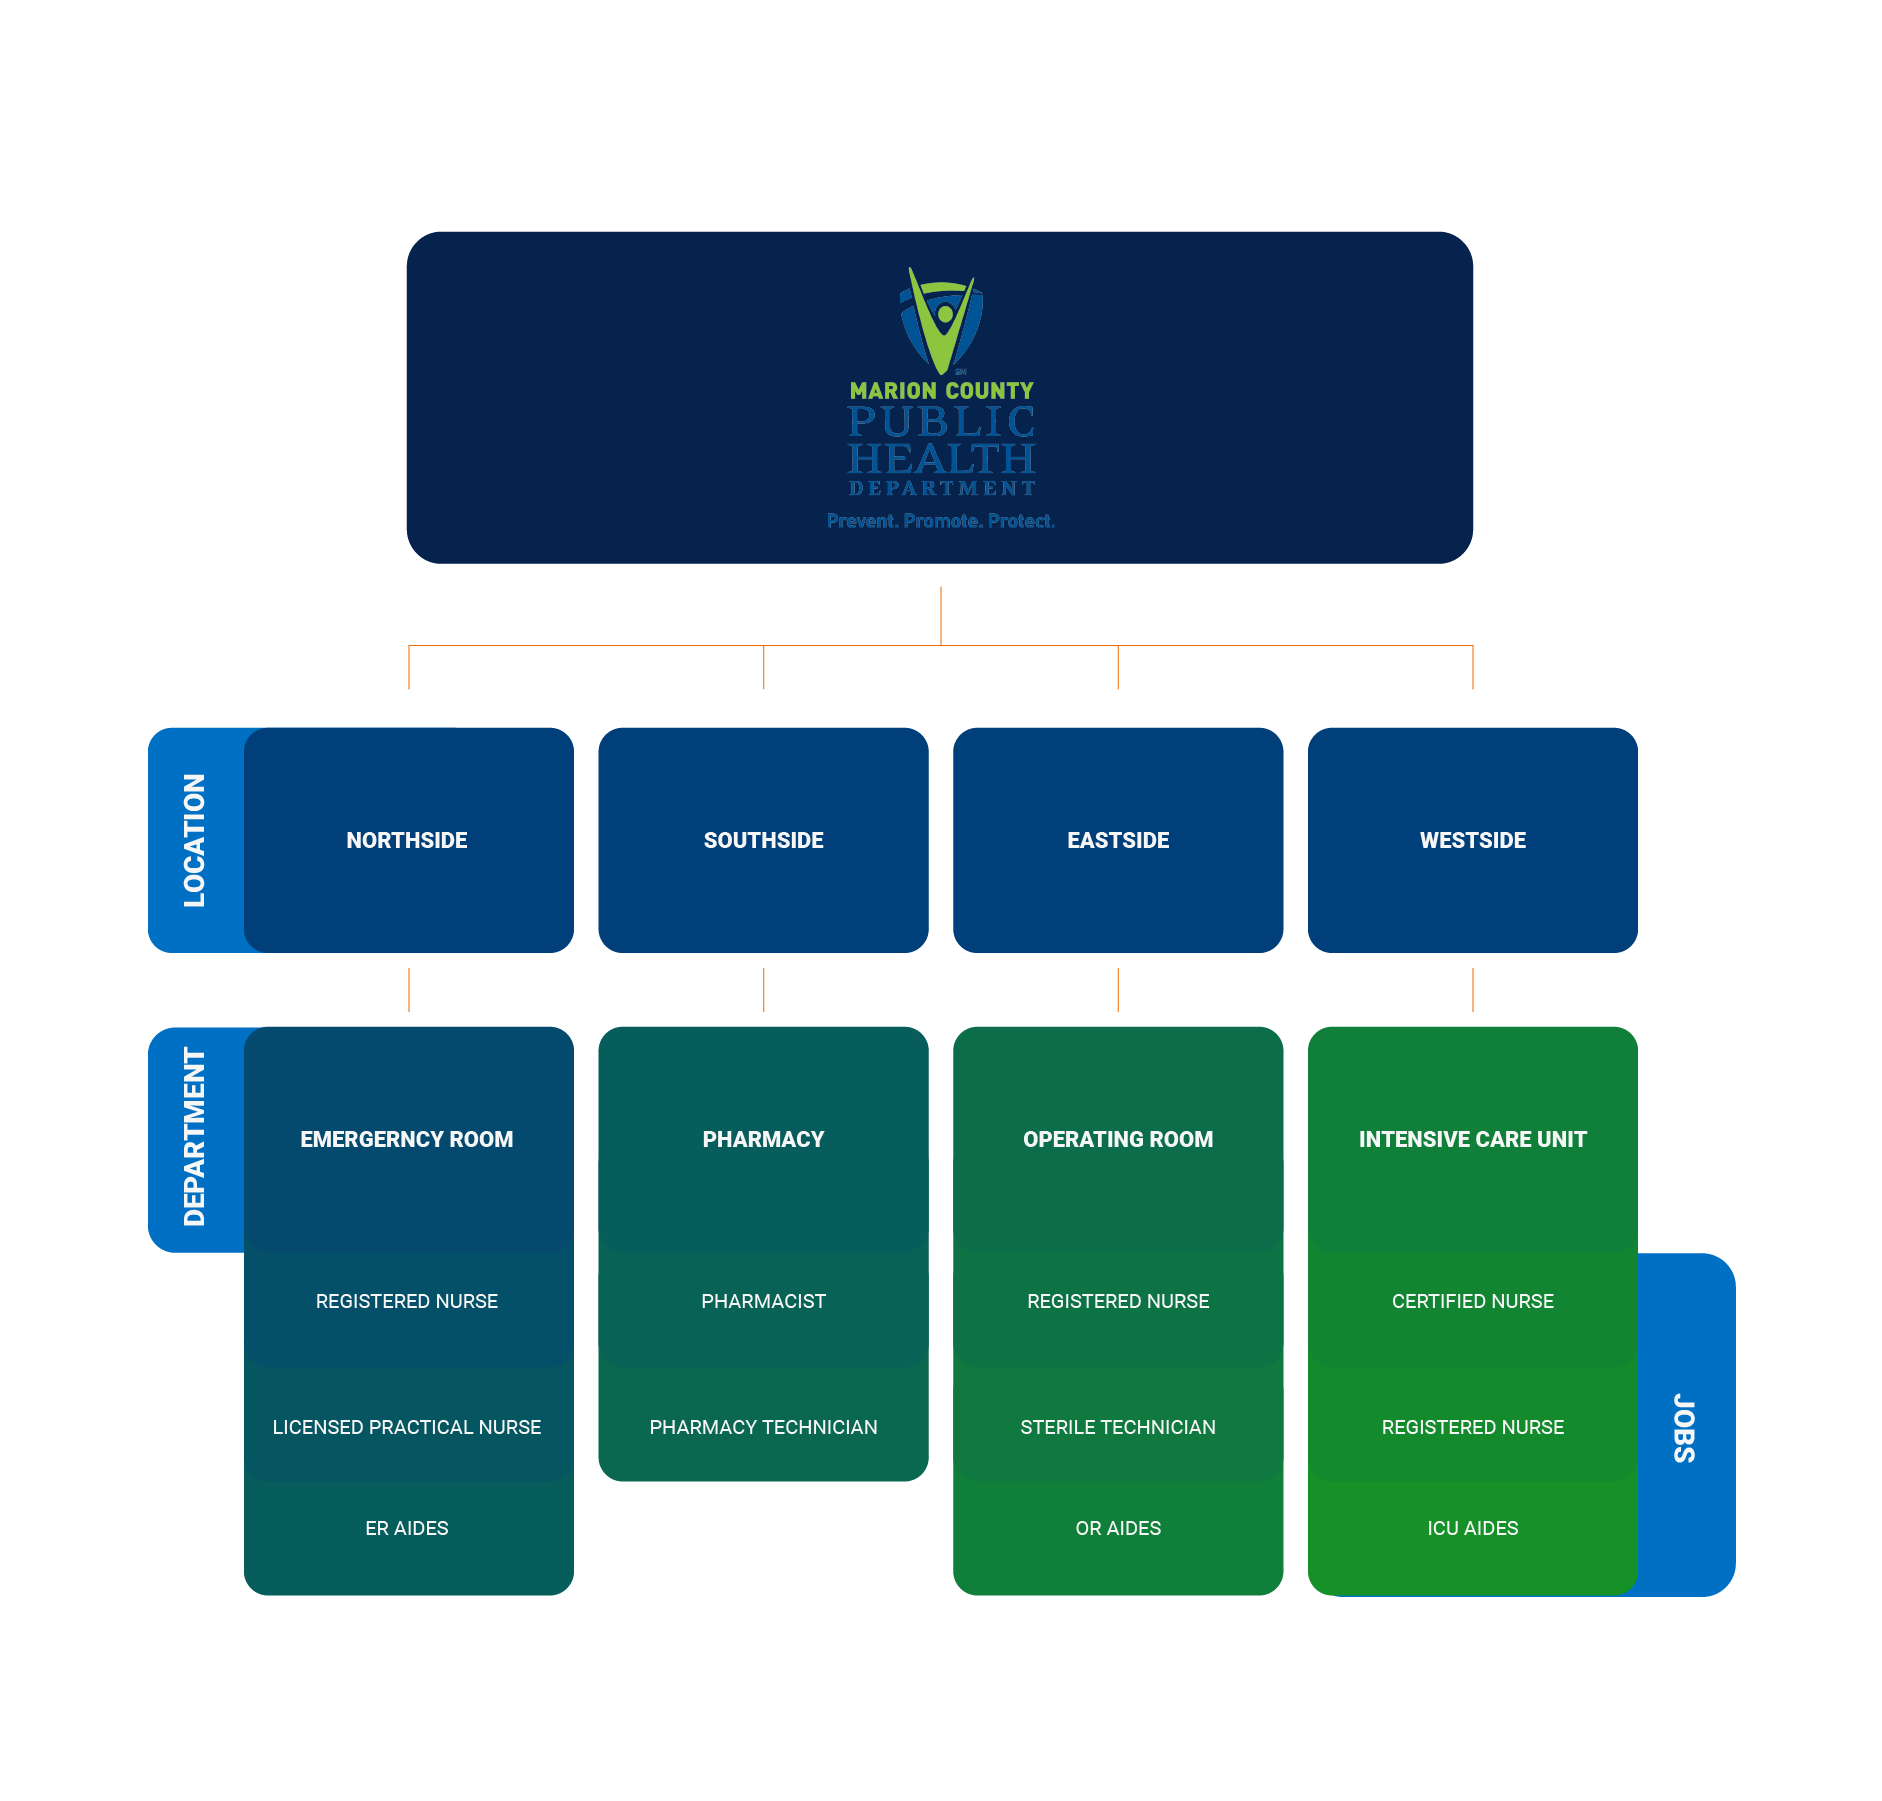
Sample Org Map for Marion Health
Kronos Labor Levels vs. Org Maps
Labor Levels are a representation of your company’s jobs and accounting structure where hours are tracked for proper costing of labor. In Kronos, an org map is the hierarchical illustration of your organization, inclusive of locations, departments, and jobs. It’s a visualization of where employees work and might be scheduled.
Why Do I Need an Org Map in Kronos?
The biggest benefit of creating an org map in Kronos is its impact on scheduling. Accurately built, your org map helps to ensure appropriate staffing while effectively charging the proper departments for your employees’ labor costs.
Planning for Your Org Map in Kronos
Before creating your org map, your labor levels have to be defined and already built in Kronos. Planning the ideal structure of your org map requires input from many key members of your company, most notably your finance department—to ensure proper costing, and staffing office members—for detailed scheduling/staffing information.
By tying the org map selections to the correct labor levels, you will ensure proper costing of labor and simplify the scheduling process for your users.
The configuration should be handled by the System Administrator. Typically, only a few people in an organization can configure and edit the org map. Changing the configuration information is not recommended after your org map has been created. However, adding new labor levels—such as location, departments, and jobs—as your company grows is necessary maintenance.
Defining Terms for Your Kronos Org Map
Once you’ve established which labor levels will be used, it’s time to define what each part of your map will look like. You’ll want to include input from key members of the project team to define each level of the map. Follow the steps below to define terms for your Kronos org map.
- Establish/define the name you will use for your organization.
- Establish/define the locations you’ll be including. For example, if we’re creating an org map for a medical facility, we might make our locations each of the individual hospitals within the facility: General Hospital, Children’s Hospital, NW Hospital, and so on.
- Establish/define the cost centers/departments that will be included in the org map. Select which departments you will be adding to each of your locations. To return to our medical facility example, our departments may be the Emergency Dept (ER), Labor and Delivery (LD), NICU, 5W, 4E, etc. When adding departments, shorten the name if possible (for reporting).
- Establish/define the jobs/positions. These will be the jobs that are necessary for scheduling purposes for the departments added. At a medical facility, these might be RN, LPN, PCA, Tech, etc.
The creation of your org map in Kronos is critical for effective scheduling and appropriate allocation of your employees’ labor. With careful planning and a successful implementation, you are well on your way to using your Kronos org map to implement Kronos Advanced Scheduler, Employee Self Service, and other products that Kronos offers that are dependent on a functional org map.